Affiliate links on Android Authority may earn us a commission.Learn more.
ML Kit Image Labeling: Determine an image’s content with machine learning
June 21, 2025
Machine learning(ML) can be a powerful addition to your Android projects. It helps you create apps that intelligently identify text, faces, objects, famous landmarks, and much more, and use that information to deliver compelling experiences to your users. However, getting started with machine learning isn’t exactly easy!
Even if you’re a seasoned ML expert, sourcing enough data to train your own own machine learning models, and adapting and optimizing them for mobile devices, can be complex, time consuming, and expensive.
ML Kit is a new machine learning SDK that aims to make machine learning accessible to everyone — even if you havezeroML experience!
Google’s ML Kit offers APIs and pre-trained models for common mobile use cases, including text recognition, face detection, and barcode scanning. In this article we’ll be focusing on the Image Labeling model and API. We’ll be building an Android app that can process an image and return labels for all the different entities it identifies within that image, like locations, products, people, activities, and animals.

Image Labeling is available on-device and in the cloud, and both approaches have strengths and weaknesses. To help you choose the approach that works best in your own Android applications, I’ll show you how to process an image on-device, using a local ML model that your app downloads at install-time,andhow to perform Image Labeling in the cloud.
What is Image Labeling?
ML Kit’s Image Labeling is an API and model that can recognize entities in an image, and supply information about those entities in the form of labels.
Each label has an accompanying score indicating how certain ML Kit is about this particular label. For example, if you provide ML Kit with an image of a fancy latte, then it might return labels such as “gelato,” “dessert,” and “coffee,” all with varying confidence scores. Your app must then decide which label is most likely to accurately reflect the image’s content — hopefully, in this scenario “coffee” will have the highest confidence score.

Once you’ve identified an image’s content, you may use this information in all kinds of ways. You might tag photos with useful metadata, or automatically organize the user’s images into albums based on their subject matter.
This API can also be handy for content moderation. If you give users the option to upload their own avatars, Image Labeling can help you filter out inappropriate imagesbeforethey’re posted to your app.
The Image Labeling API is available both on-device and in the cloud, so you can pick and choose which approach makes the most sense for your particular app. You could implement both methods and let the user decide, or even switch between local and cloud-powered Image Labeling based on factors like whether the device is connected to a free Wi-Fi network or using its mobile data.
If you’re making this decision, you’ll need to know the differences between on-device and local Image Labeling:
On device, or in the cloud?
There’s several benefits to using the on-device model:
The major drawback is on-device model has much less information to consult than its cloud-based counterpart. According to the official docs, on-device Image Labeling gives you access to over 400 labels covering the most commonly used concepts in photos. The cloud model has access to over10,000labels.
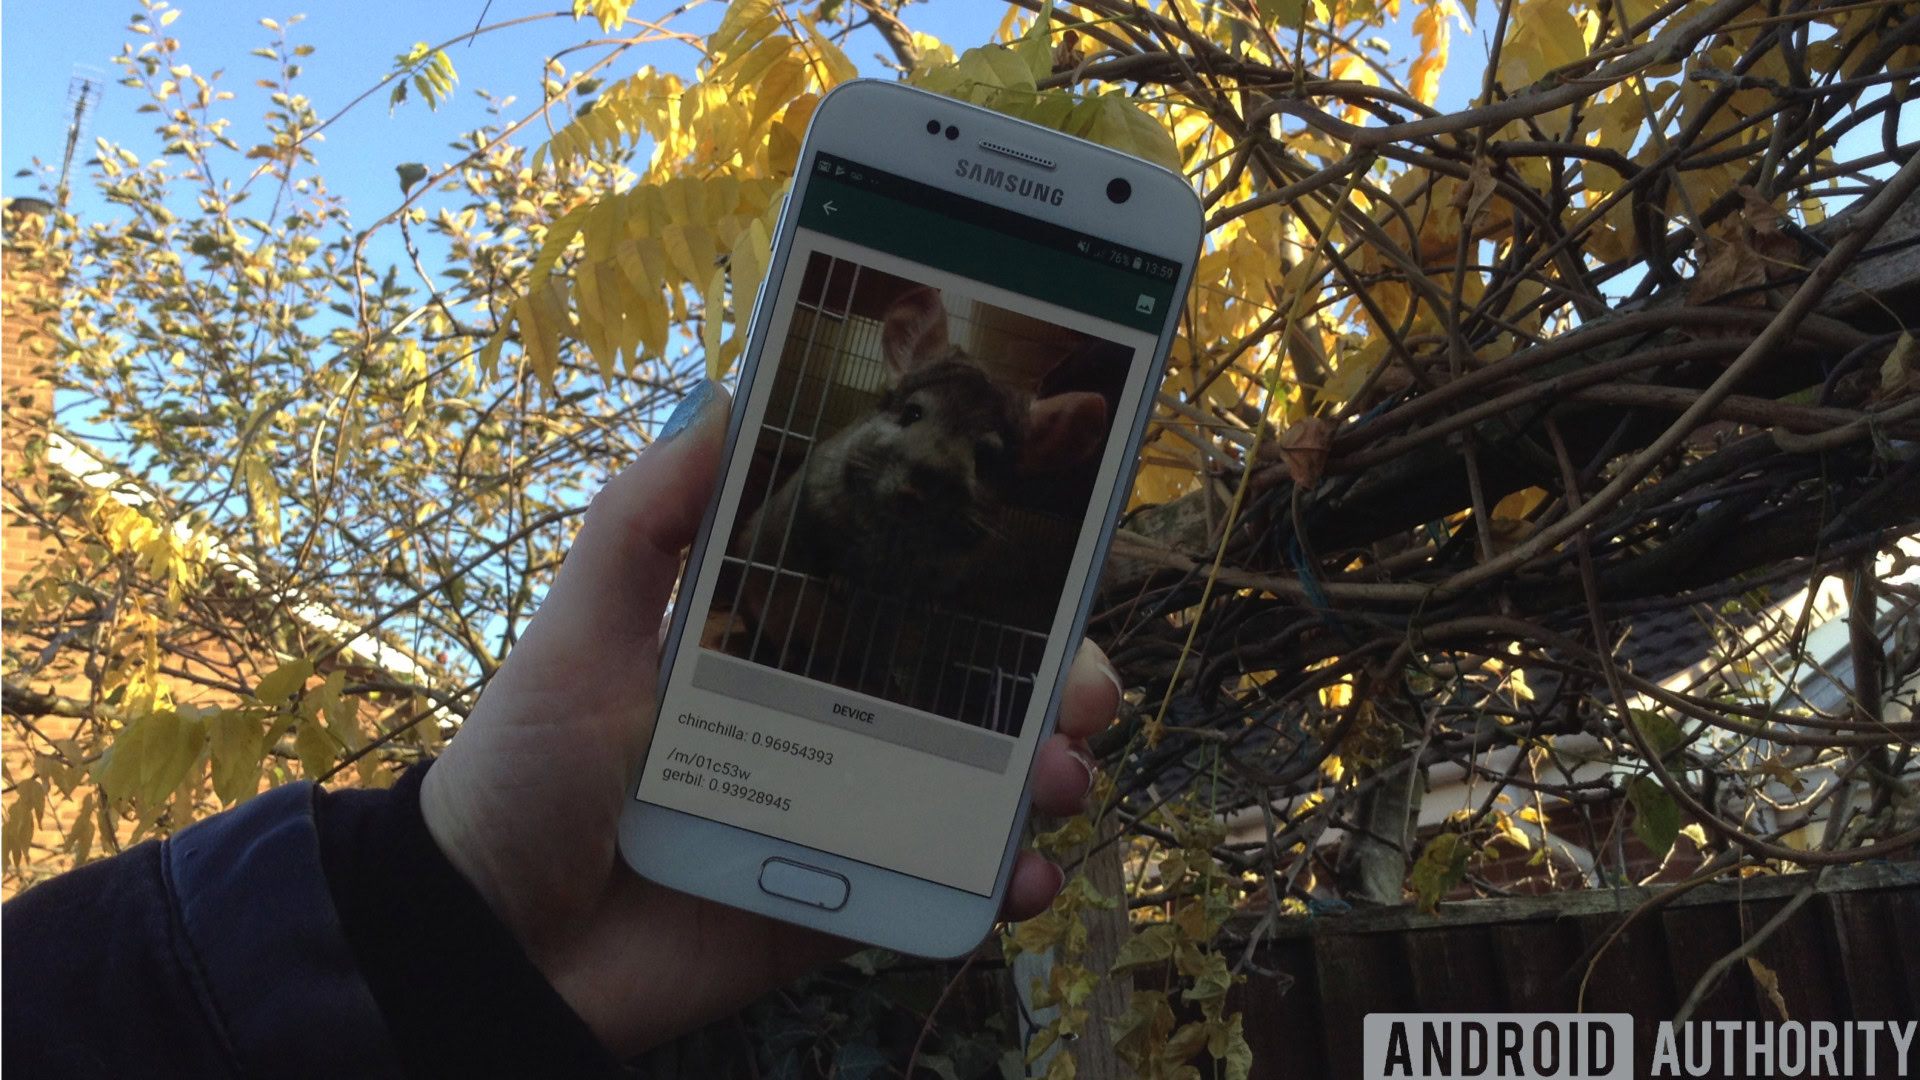
While accuracy will vary between images, you should be prepared to receive less accurate results when using Image Labeling’s on-device model. The following screenshot shows the labels and corresponding confidence scores for an image processed using the on-device model.
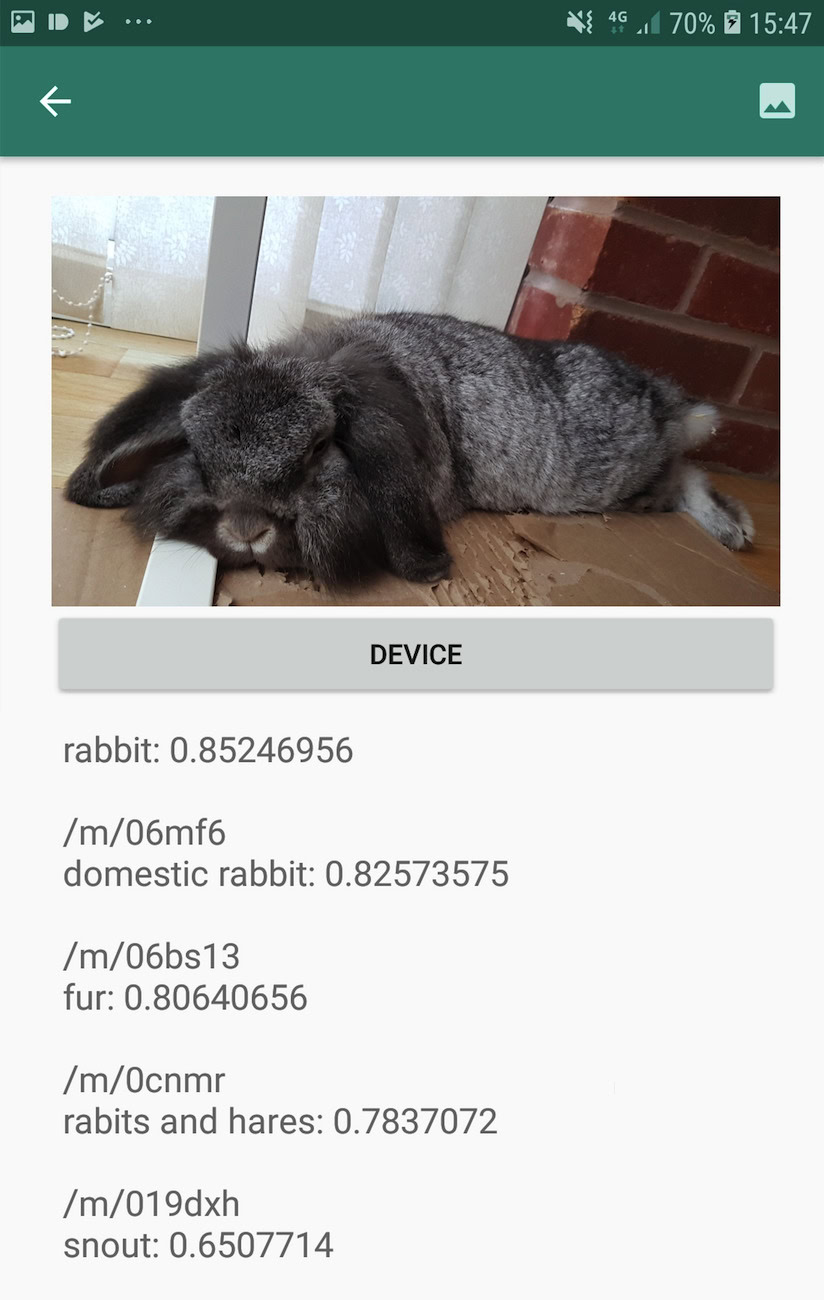
Now here are the labels and confidence scores retrieved using the cloud model.
As you can see, these labels are much more accurate, but this increased accuracy comes at a price!
The cloud-based Image Labeling API is a premium service that requires upgrading your Firebase project to the pay-as-you-goBlaze plan. It also requires an internet connection, so if the user goes offline they’ll lose access to all parts of your app that rely on the Image Labeling API.
Which are we using, and will I need to enter my credit card details?
In our app, we’ll be implementing both the on-device and cloud Image Labeling models, so by the end of this article you’ll know how to harness the full power of ML Kit’s cloud-based processing,andhow to benefit from the real-time capabilities of the on-device model.
Although the cloud model is a premium feature, there’s a free quota in place. At the time of writing, you can perform Image Labeling on up to 1,000 images per month for free. This free quota should be more than enough to complete this tutorial, but youwillneed to enter your payment details into the Firebase Console.
If you don’t want to hand over your credit card information, just skip this article’s cloud sections — you’ll still end up with a complete app.
Create your project and connect to Firebase
To start, create a new Android project with the settings of your choice.
Since ML Kit is a Firebase service, we need to create a connection between your Android Studio project, and a corresponding Firebase project:
On-device Image Labeling: Downloading Google’s pre-trained models
To perform on-device Image Labeling, your app needs access to a local ML Kit model. By default, ML Kit only downloads local models as and when they’re required, so your app will download the Image Labeling model the first time it needs to use that particular model. This could potentially result in the user trying to access one of your app’s features, only to then be left waiting while your app downloads the model(s) necessary to deliver that feature.
To provide the best on-device experience, you should take a proactive approach and download the required local model(s) at install-time. You can enable install-time downloads by adding “com.google.firebase.ml.vision.DEPENDENCIES” metadata to your app’s Manifest.
While we have the Manifest open, I’m also going to add the WRITE_EXTERNAL_STORAGE permission, which we’ll be using later in this tutorial.
Now, as soon as our app is installed from the Google Play Store, it’ll automatically download the ML models specified by “android:value.”
Building our Image Labeling layout
I want my layout to consist of the following:
Here’s my completed activity_main.xml file:
This layout references a “ic_placeholder” drawable, which we’ll need to create:
Action bar icons: Choosing an image
Next, we need to create an action bar item, which will launch the user’s gallery, ready for them to select an image.
You define action bar icons inside a menu resource file, which lives inside a “res/menu” directory. If your project doesn’t already contain a “menu” directory, then you’ll need to create one:
Next, create the menu resource file:
The menu file references an “action_gallery” string, so open your project’s res/values/strings.xml file and create this resource. While I’m here, I’m also defining all the other strings we’ll be using throughout this project:
Next, we need to create the action bar’s “ic_gallery” icon:
Handling permission requests and click events
I’m going to perform all the tasks that aren’t directly related to the Image Labeling API in a separate BaseActivity class. This includes instantiating the menu, handling action bar click events, requesting access to the device’s storage and then using onRequestPermissionsResult to check the user’s response to this permission request.
Don’t waste time processing large images!
Next, create a new “MyHelper” class, where we’ll resize the user’s chosen image. By scaling the image down before passing it to ML Kit’s detectors, we can accelerate the image processing tasks.
Displaying the user’s chosen image
Next, we need to grab the image the user selected from their gallery, and display it as part of our ImageView.
Teaching an app to label images on-device
We’ve laid the groundwork, so we’re ready to start labeling some images!
Customize the image labeler
While youcoulduse ML Kit’s image labeler out of the box, you can also customize it by creating aFirebaseVisionLabelDetectorOptionsobject, and applying your own settings.
I’m going to create a FirebaseVisionLabelDetectorOptions object, and use it to tweak the confidence threshold. By default, ML Kit only returns labels with a confidence threshold of 0.5 or higher. I’m going to raise the bar, and enforce a confidence threshold of 0.7.
Create a FirebaseVisionImage object
ML Kit can only process images when they’re in the FirebaseVisionImage format, so our next task is converting the user’s chosen image into a FirebaseVisionImage object.
Since we’re working with Bitmaps, we need to call the fromBitmap() utility method of the FirebaseVisionImage class, and pass it our Bitmap:
Instantiate the FirebaseVisionLabelDetector
ML Kit has different detector classes for each of its image recognition operations. Since we’re working with the Image Labeling API, we need to create an instance of FirebaseVisionLabelDetector.
If we were using the detector’s default settings, then we could instantiate the FirebaseVisionLabelDetector using getVisionLabelDetector(). However, since we’ve made some changes to the detector’s default settings, we instead need to pass the FirebaseVisionLabelDetectorOptions object during instantiation:
The detectInImage() method
Next, we need to pass the FirebaseVisionImage object to the FirebaseVisionLabelDetector’s detectInImage method, so it can scan and label the image’s content. We also need to register onSuccessListener and onFailureListener listeners, so we’re notified whenever results become available, and implement the related onSuccess and onFailure callbacks.
Retrieving the labels and confidence scores
Assuming the image labeling operation is a success, an array of FirebaseVisionLabels will pass to our app’s OnSuccessListener. Each FirebaseVisionLabel object contains the label plus its associated confidence score, so the next step is retrieving this information and displaying it as part of our TextView:
At this point, your MainActivity should look something like this:
Analyze an image with ML Kit
At this point, our app can download ML Kit’s Image Labeling model, process an image on device, and then display the labels and corresponding confidence scores for that image. It’s time to put our application to the test:
This app will now analyze your image using the on-device ML Kit model, and display a selection of labels and confidence scores for that image.
Analyzing images in the cloud
Now our app can process images on device, let’s move onto the cloud-based API.
The code for processing an image using ML’s Kit’s cloud model, is very similar to the code we used to process an image on-device. Most of the time, you simply need to add the word “Cloud” to your code, for example we’ll be replacing FirebaseVisionLabelDetector with FirebaseVisionCloudLabelDetector.
Once again, we can use the default image labeler or customize it. By default, the cloud detector uses the stable model, and returns a maximum of 10 results. you’re able to tweak these settings, by building a FirebaseVisionCloudDetectorOptions object.
Here, I’m using the latest available model (LATEST_MODEL) and returning a maximum of five labels for each image:
Next, you need to run the image labeler by creating a FirebaseVisionImage object from the Bitmap, and passing it to the FirebaseCloudVisionLabelDetector’s detectInImage method:
Then we need to get an instance of FirebaseVisionCloudLabelDetector:
Finally, we pass the image to the detectInImage method, and implement our onSuccess and onFailure listeners:
If the image labeling operation is a success, a list of FirebaseVisionCloudLabel objects will be passed to our app’s success listener. We can then retrieve each label and its accompanying confidence score, and display it as part of our TextView:
Activating Google’s cloud-based APIs
ML Kit’s cloud-based APIs are all premium services, so you’ll need to upgrade your Firebase project to a Blaze plan before your cloud-based code actually returns any image labels.
Although you’ll need to enter your payment details and commit to a pay-as-you-go Blaze plan, at the time of writing you can upgrade, experiment with the ML Kit features within the 1,000 free quota limit, and switch back to the free Spark plan without being charged. However, there’s no guarantee the terms and conditions won’t change at some point, so before upgrading your Firebase projectalwaysread all the available information, particularly theAI & Machine Learning ProductsandFirebase pricingpages.
If you’ve scoured the fine print, here’s how to upgrade to Firebase Blaze:
You can now enable ML Kit’s cloud-based APIs:
Testing your completed machine learning app
That’s it! Your app can now process images on-device and in the cloud. Here’s how to put this app to the test:
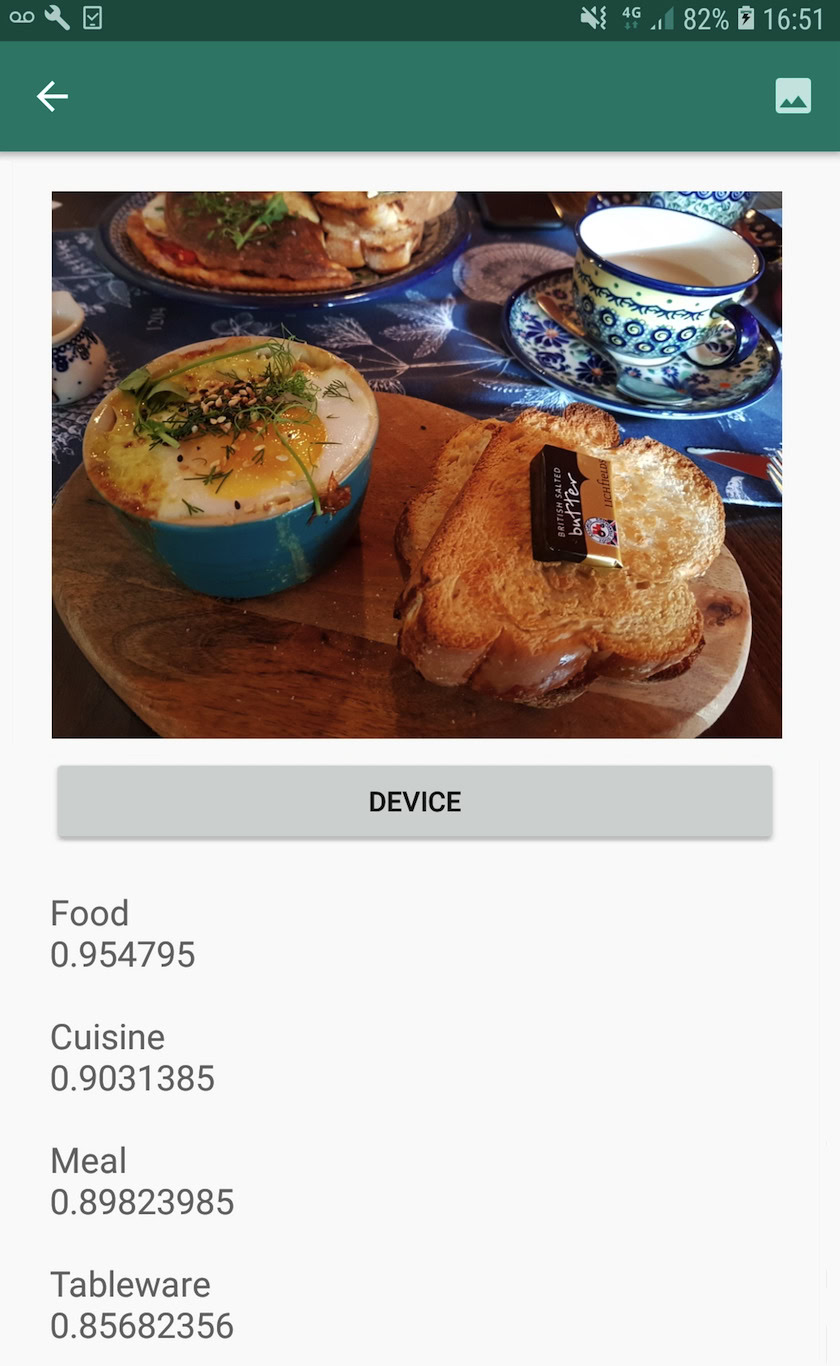
Your app will now run this image against the cloud-based ML Kit model, and return a selection of labels and confidence scores.
You candownload the completed ML Kit project from GitHub, although you will still need to connect the application to your own Firebase project.
Keep an eye on your spending
Since the cloud API is a pay-as-you-go service, you should monitor how your app uses it. The Google Cloud Platform has a dashboard where you can view the number of requests your application processes, so you don’t get hit by any unexpected bills!
you’re able to also downgrade your project from Blaze back to the free Spark plan at any time:
You should receive an email confirming that your project has been downgraded successfully.
Wrapping up
You’ve now built your own machine learning-powered application, capable of recognizing entities in an image using both on-device and in-the-cloud machine learning models.
Have you used any of the ML Kit APIs we’ve covered on this site?
Thank you for being part of our community. Read ourComment Policybefore posting.
