Affiliate links on Android Authority may earn us a commission.Learn more.
Reactive programming with RxAndroid
June 03, 2025
Reactive programming, RxJava and RxAndroid have become increasingly familiar nomenclature within the Android app development world. For someone new to these concepts, it can appear a little bit overwhelming and strange. The aim of this tutorial is to show how simple reactive programming actually is, and to serve as an introduction for developers not familiar with the concept (also a refresher for all you uber reactive programmers).
Reactive programming concepts
Reactive programming is an extension of theObserver software designpattern, where an object has a list of Observers that are dependent on it, and these Observers are notified by the object whenever it’s state changes.
In simpler terms:
There are three different changes that can occur on an Observable that the Observer reacts to. These are:
A class that implements the Observer interface must provide methods for each of the three changes above:

Sample Program
As usual, we have developed a sample app,available on github, that demonstrates the concepts in this tutorial. Each concept is presented in it’s own Activity. You’ll need the rxjava and rxandroid libraries for this tutorial, which you can add to your project by including the following lines in your app build.gradle file.
Simple Example
Our first sample activity is the quintessential Hello World. We are going to create an Observable that retrieves a string from a TextView, and publishes this string to an Observer. This Observer then outputs the string to a TextBlock.
Creating an ObservableWe’ve elected to create our Observable using the static Observable.create() method. There are a ton of different ways to create Observables, some of which we’ll get to later, and most of which you’ll discover based on your needs.

Creating an ObserverCreating our Observer is pretty straightforward, as seen in the code chunk below. We simply override the Observer interface methods. Notice that we have empty implementations for both onCompleted and onError.
Voila! We have used reactive programming to fetch and display a string in an Android app. Now, this is a lot of work to display a string, and can be done with much more simplicity and elegance using

Let’s move on to a more involved sample.
Asynchronous Example
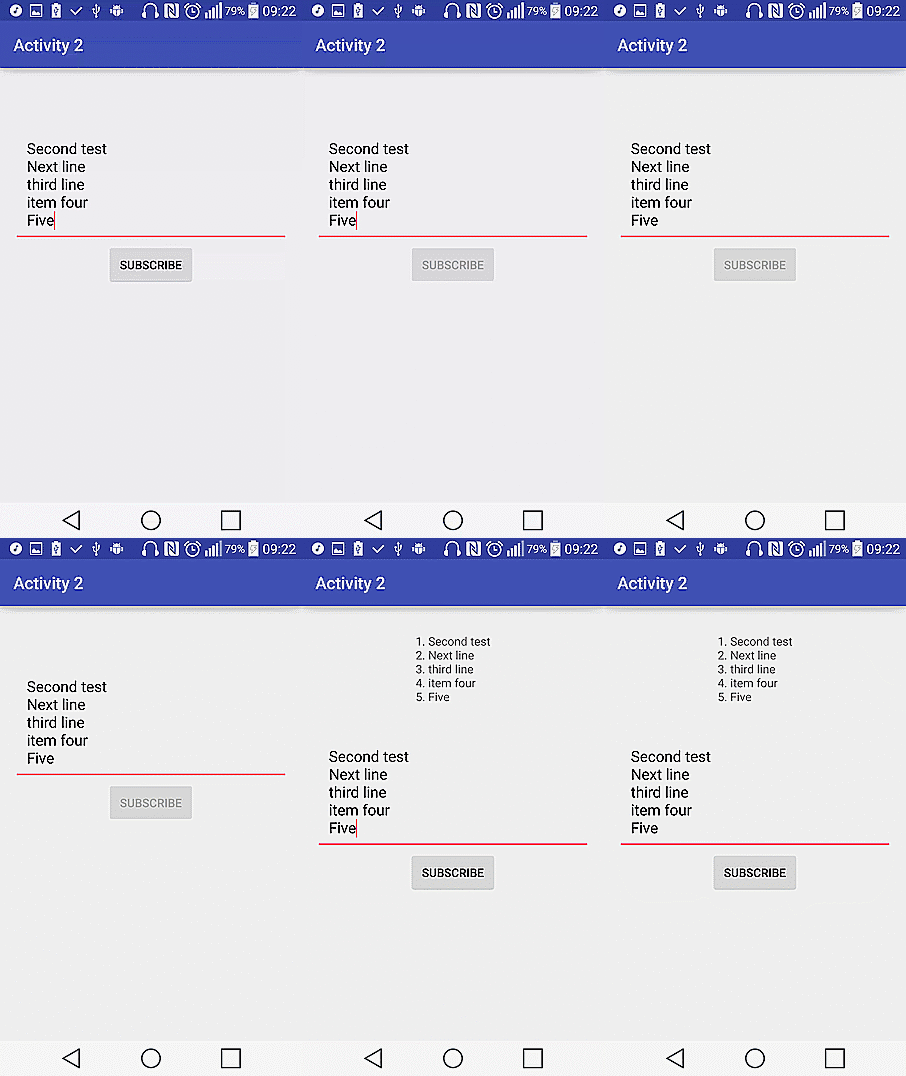
In the previous sample, the Observable fetched a string instantly from within the app. It is highly likely, however, that the Observable would need to perform some long running task such as fetching data from a remote server. For this next sample, we are going to pause for 3 seconds while in the Observable, and then modify the received string before publishing it to the Observer.
As dicussed above, within the Observable, execution is paused for 3000 milliseconds, and then the content of the EditText is split based on newlines. Each line is numbered, and then all the lines are published to the Observer.

The Observer remains unchanged from the previous sample. It expects a string from the Observable, and publishes this string to the TextBlock.
Execute Observable on another thread
For any application that users interact with, long running tasks should not be executed on the main UI thread, since this can freeze up the application, and make it appear unresponsive. In Android development, these kind of tasks are usually abstracted into an AsyncTask, and when the task is complete, the UI is updated via on the main thread.
To achieve the same using RxAndroid,

Introducing Operators
We added a couple of intermediate steps between the Observable and the final Observer. Each step above creates a new Observable, and there can be any number of intermediate steps between the initial Observable and the final Observer. These intermediate methods are referred to as operators. There are a huge number of operators in the RxJava library, which we cannot realistically make a dent in within a reasonably sized article.
An interesting, and easy to understand operator is the map() operator. It transforms objects of one type to another. for example
In the snippet above, we are converting an Observable that publishes an Integer into an Observable that publishes a String. In the call method, we receive an Integer, and return the String equivalent. The map() method handles the creation of the relevant Observable.
Other ways of creating Observables
Up to this point, we’ve used only the Observable.create() method to initialize our Observables. The RxJava library contains many other methods for creating Observables, depending on the initial data, and/or how the published values should be consumed. Two of these many methods include Observable.from() and Observable.just().
Observable.just() converts any object into an Observable. For example, the following single line will completely replace the Observable.create() block in our two sample Activity classes above.
An Observable is created with the single line above. Observable.from() is identical to Observable.just(), except that it expects an Iterable, and will publish an Observable for each of the contents of the Iterable.
A more involved sample
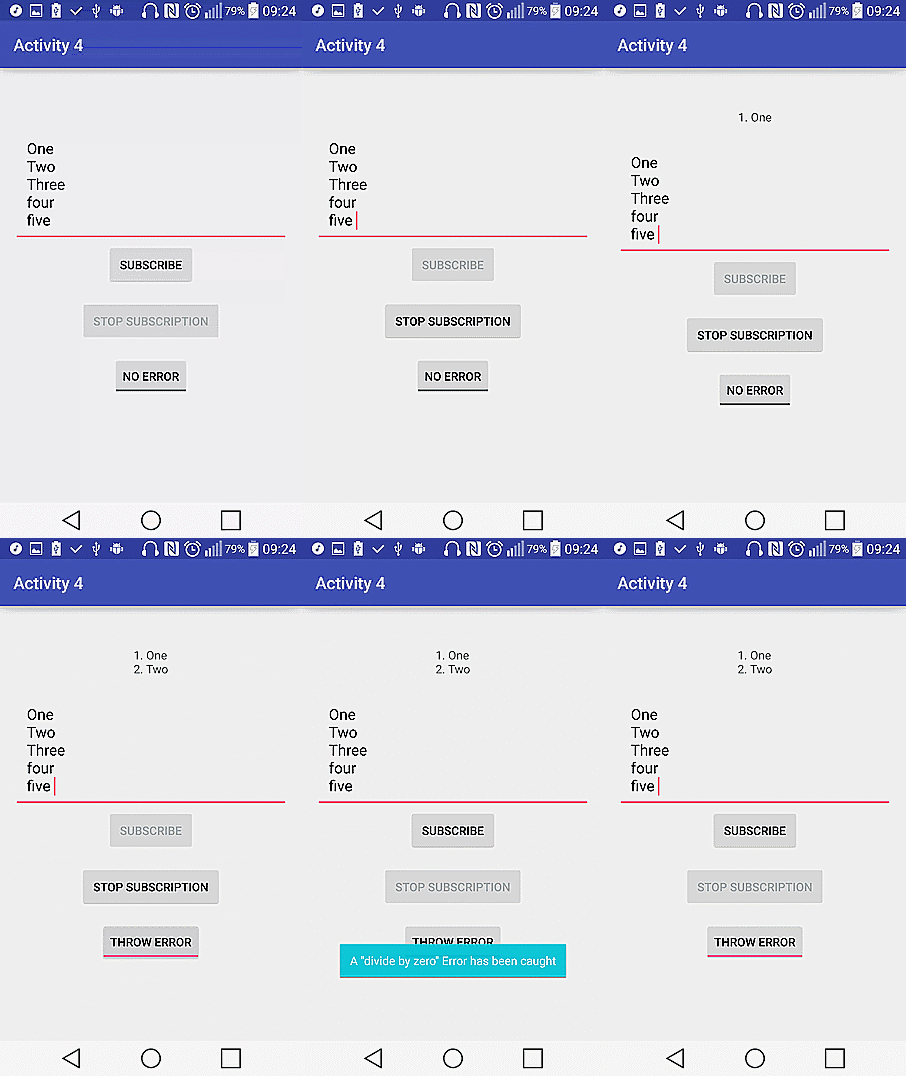
The third sample is going to build expand on the second, an utilize the new concepts introduced above. We will split a string into a list, then, for each item in the list, we would append it’s position in the list, and publish each item.
We’ve condensed the creation of the Observable, using Observable.from(). For each String published to map(), the app sleeps for 2000 milliseconds, appends the string position to the string, before finally publishing to the Observer. The Observer still remains unchanged.
Handling Errors
An error anywhere in between the source Observable and target Observer gets propagated directly to the Observer’s onError() method. The advantage of this is that there is one central place for error handling. No matter how complex your Observable tree gets, the error handling is done at the end, within the Observer’s onError().
To test this, we included a toggle button, to indicate if we want to trigger an error condition. Within the map() operator, we attempt a divide by zero if the toggle is checked, as shown below.
Stopping Subscriptions
So far, we have gone by the assumption that our Observables will execute to completion, and publish all values to the Observer. This is not practicable in real life, since the user might close your app before your Observable has done executing. Also, your Observable can possibly never terminate, publishing values on a timer, or on receipt of data from some other source.
Final Notes
Observers should be what reacts to mutations. You should avoid performing any cpu and/or network intensive tasks on an Observer. In fact, you should perform as little computation as possible in your Observers. All the hard work should be done in the Observable, while the Observer receives the results. Check out theRxJavaandRxAndroidjavadocs for more information.
As usual, the complete source code for the examples used in this tutorial isavailable on github. Feel free to check out and use however you see fit.
Thank you for being part of our community. Read ourComment Policybefore posting.